Building a home theater doesn’t mean maxing out credit cards or sacrificing an entire room. A cheap home theater system can deliver immersive sound and a theater-like experience for a fraction of what premium setups cost. The trick isn’t chasing flagship gear, it’s understanding which components actually matter, where to spend wisely, and how to install everything yourself. Whether working with a couple hundred dollars or a modest four-figure budget, homeowners can assemble a system that outperforms most TVs’ built-in speakers by a wide margin. This guide walks through the essentials, from choosing components to wiring speakers without hiring an installer.
Table of Contents
ToggleKey Takeaways
- A cheap home theater system between $200–$800 can deliver theater-quality sound by prioritizing speakers and subwoofers over expensive receivers.
- For budget setups, invest 60–70% of your budget in quality speakers or soundbars, avoiding unnecessary surround channels in smaller rooms.
- Soundbar systems offer plug-and-play simplicity for tight spaces, while 5.1 component systems provide better soundstage separation and upgrade flexibility for DIY builders.
- Proper speaker placement, calibration using auto-tuning features, and acoustic treatment (rugs, curtains) make larger differences in sound quality than premium cables.
- Smart shopping tactics like buying refurbished gear, choosing last year’s models, and skipping extended warranties can reduce costs by 20–40% without sacrificing performance.
What Makes a Home Theater System “Cheap” Without Sacrificing Quality?
A cheap home theater system typically falls between $200 and $800, depending on the room size and audio expectations. At this price point, the goal is maximizing perceived value, not chasing audiophile-grade specs.
Quality in budget systems comes from:
- Prioritizing speakers over receivers. Investing 60-70% of the budget in decent speakers or a quality soundbar yields better results than pairing cheap speakers with an expensive receiver.
- Avoiding unnecessary channels. A 5.1 system (five speakers plus a subwoofer) provides genuine surround sound. Jumping to 7.1 or Atmos configurations rarely justifies the cost increase in smaller rooms.
- Choosing passive or powered options smartly. Powered soundbars simplify setup and cost less upfront, while passive speaker systems offer upgrade flexibility down the line.
- Skipping wireless gimmicks. Bluetooth and Wi-Fi add cost. Wired connections remain more reliable and cheaper.
Cheap doesn’t mean compromised if the system matches the space. A soundbar with a wireless subwoofer often outperforms a poorly configured 5.1 setup in rooms under 200 square feet.
Essential Components for Your Budget Home Theater Setup
Every home theater needs a few core pieces. Here’s what actually matters and what can wait.
Display and Source
The TV or projector displays content, but it’s not technically part of the audio system. But, ensure the display has HDMI ARC (Audio Return Channel) or eARC, this sends audio from the TV back to the receiver or soundbar without extra cables.
Source devices (streaming sticks, Blu-ray players, game consoles) should support at least Dolby Digital 5.1 output. Most modern devices do.
Speakers or Soundbar
This is the heart of the system. Two routes exist:
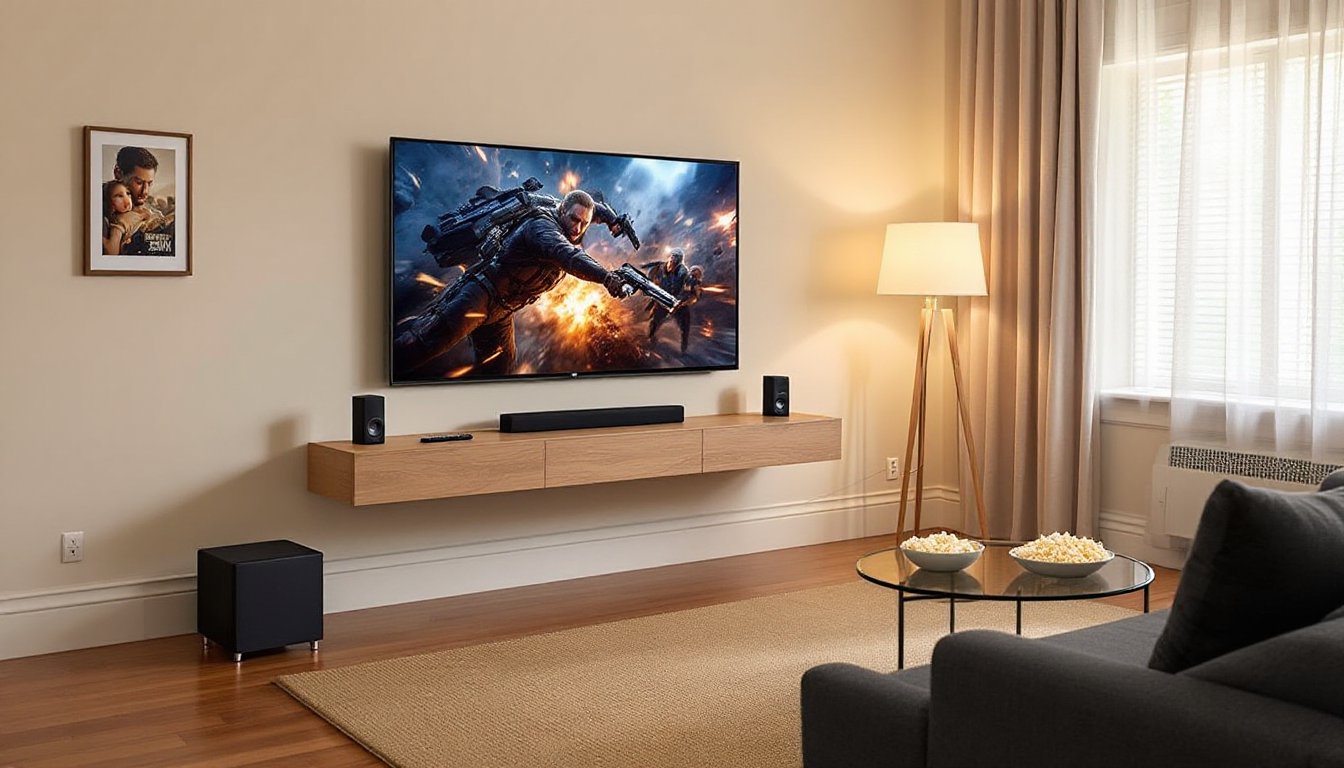
Soundbar systems include multiple drivers in a single cabinet, often with a separate subwoofer. They’re plug-and-play, wall-mountable, and ideal for rooms where running speaker wire isn’t practical. Look for models with at least 200 watts total output and a dedicated subwoofer.
Component speaker systems use individual speakers: two front mains, a center channel, two surrounds, and a subwoofer. They require more setup but offer better soundstage separation. Budget bookshelf speakers (5.25-inch to 6.5-inch woofers) work well for front mains in rooms up to 15 feet wide.
Receiver (for component systems)
An AV receiver powers passive speakers and switches between sources. For cheap setups, a 5.1-channel receiver with 75-100 watts per channel handles most needs. Features to prioritize:
- HDMI inputs (at least four)
- 4K passthrough
- Auto-calibration (like Audyssey or YPAO) to tune speaker output
Skip receivers with features like built-in streaming or voice assistants, those add cost without improving sound.
Subwoofer
The subwoofer handles low frequencies (explosions, bass lines, rumble). A 10-inch or 12-inch powered subwoofer with at least 100 watts works for most living rooms. Front-firing models are easier to place: down-firing units need space to breathe.
Cables and Mounts
Budget for:
- HDMI 2.0 or 2.1 cables (about $10-15 each for 6-foot lengths)
- 16-gauge speaker wire (100-foot spools run $20-30)
- Banana plugs or spade connectors for clean speaker terminations
- Wall mounts or speaker stands if not placing speakers on furniture
Best Cheap Home Theater Systems You Can Buy Today
Here are proven configurations based on real-world testing and budget tiers, including options highlighted in recent budget home theater reviews.
Under $300: Soundbar Route
For tight budgets, a 2.1 soundbar system works. Look for models with:
- At least two HDMI inputs
- A wireless subwoofer
- Dolby Digital decoding
Several 2.1 systems from major manufacturers deliver clean dialogue and decent bass without complex setup.
$400-$600: Entry 5.1 Component System
This budget supports:
- A refurbished or entry-level 5.1 receiver (around $200-250)
- A matched set of compact bookshelf speakers for fronts and surrounds ($150-200)
- A center channel speaker ($60-80)
- A 10-inch powered subwoofer ($100-150)
Buy open-box or last-generation models to stretch dollars. Many affordable home theater options focus on slightly older tech that still meets current standards.
$600-$800: Premium Soundbar or Better Components
At this tier, choose between:
- A 3.1.2 soundbar with Dolby Atmos support and upfiring drivers for height channels
- A component system with better speakers (6.5-inch woofers, higher sensitivity ratings) and a 12-inch subwoofer
The soundbar offers simpler setup: the component system provides better upgrade paths.
DIY Home Theater Installation: Step-by-Step Setup Guide
Installing a home theater system doesn’t require an electrician, but it does demand attention to layout, wire routing, and calibration.
Step 1: Plan Speaker Placement
For a 5.1 system:
- Front left and right speakers: Position them at ear height (about 36-42 inches off the floor when seated), angled 22-30 degrees from center.
- Center channel: Place directly below or above the TV, angled toward the seating area.
- Surround speakers: Mount on side walls, 2-3 feet above ear level, slightly behind the main seating position.
- Subwoofer: Start in a front corner, then test other locations. Bass response varies wildly by room.
For soundbars, center the unit directly below the TV. If wall-mounting, ensure the mounting bracket is level and anchored into studs (not just drywall). Use a stud finder and 2.5-inch wood screws for secure mounting.
Step 2: Run Speaker Wire (Component Systems)
Use 16-gauge speaker wire for runs under 50 feet. For longer distances, step up to 14-gauge.
- Measure the distance from the receiver to each speaker, adding 20% slack.
- Route wire along baseboards or inside walls if running through existing construction. Fish tape helps pull wire through walls: this may require cutting small access holes that’ll need patching.
- Strip 1/2 inch of insulation from wire ends.
- Attach banana plugs or insert bare wire into receiver and speaker terminals. Maintain correct polarity (positive to positive, negative to negative).
Safety note: If running wire inside walls near electrical lines, keep at least 6 inches separation to avoid interference. Consult local electrical codes, some jurisdictions require in-wall speaker wire to be CL2-rated or higher.
Step 3: Connect Components
- Connect all source devices (Blu-ray, streaming box, game console) to the receiver’s HDMI inputs.
- Run a single HDMI cable from the receiver’s “HDMI Out” to the TV’s HDMI ARC port.
- Plug in the subwoofer and connect it to the receiver’s subwoofer pre-out using an RCA cable.
- For soundbars, connect the TV’s HDMI ARC port to the soundbar’s HDMI ARC input. Most soundbars also offer optical audio as a backup connection.
Step 4: Calibrate the System
Run the receiver’s auto-calibration routine using the included microphone. Place the mic at the primary listening position (usually the center seat of the couch).
Auto-calibration sets:
- Speaker distances
- Individual channel levels
- Crossover frequencies (where the subwoofer takes over from the main speakers)
After auto-calibration, manually adjust the subwoofer level, most systems set it too low. Increase it 2-3 dB for movies, slightly less for music.
For soundbars, calibration is usually automatic or controlled via a companion app.
Smart Shopping Tips to Maximize Your Home Theater Budget
Getting the most sound per dollar takes strategy, not just price comparison.
Buy refurbished or open-box gear. Receivers and speakers rarely fail. Manufacturer refurbs come with warranties and cost 20-40% less than new. Check return policies, most retailers allow 30-90 days for returns.
Prioritize last year’s models. Home theater tech moves slowly. A 2025 receiver supports the same formats as a 2026 model in most cases. When new models launch (typically in spring), prices on prior generations drop significantly.
Mix and match wisely. Speakers don’t need to match brands, but they should match sensitivity ratings (measured in dB) within a few points to balance output levels. Timbre-matching (similar tonal character) matters more for front left, center, and front right speakers than for surrounds.
Consider DIY speaker kits. Pre-cut MDF cabinet kits with quality drivers and crossovers cost 30-50% less than finished speakers. Assembly requires wood glue, clamps, and patience, but no special tools. This isn’t for everyone, but it stretches a $400 speaker budget to $600-equivalent performance.
Skip extended warranties. Most component failures happen within manufacturer warranty periods (typically one year). Extended warranties on sub-$800 systems rarely pay off.
Watch for bundle deals. Some retailers package receivers with speaker sets at discounts. According to various home theater system comparisons, bundled systems often save $100-200 versus buying components separately, though individual component quality may vary.
Common Mistakes to Avoid When Building a Budget Home Theater
Most cheap home theater failures come from a few predictable mistakes.
Skipping the subwoofer. Small speakers can’t reproduce low frequencies. A $100 subwoofer adds more impact than upgrading from $50 speakers to $150 speakers. Don’t skip it.
Undersizing the receiver. If the receiver struggles to power speakers (clipping, distortion at moderate volume), the entire system suffers. Match receiver wattage to speaker needs, most bookshelf speakers need at least 50-75 watts per channel.
Ignoring room acoustics. Hard surfaces (tile, hardwood, bare walls) cause echo and muddy sound. Add area rugs, curtains, or wall hangings to absorb reflections. This costs less than upgrading components and often makes a bigger difference.
Placing the center channel incorrectly. The center handles most dialogue. If it’s blocked, muffled, or angled wrong, viewers miss half the movie. Ensure it has a clear path to the seating area.
Forgetting wire management. Loose speaker wire is a trip hazard and looks sloppy. Use cable raceways along baseboards or run wire under rugs. For wall-mounted setups, fish wire inside walls or use paintable cord covers.
Overspending on cables. Gold-plated, “oxygen-free” HDMI cables don’t improve digital signals. Buy certified cables (look for “Premium Certified” labels) at standard prices. A $10 HDMI cable performs identically to a $50 one for runs under 15 feet.
Conclusion
A cheap home theater system isn’t about cutting corners, it’s about smart trade-offs. Focus spending on speakers and the subwoofer, buy last year’s receiver, and handle installation personally. The difference between TV speakers and even a modest 5.1 setup is night-and-day, and most of that difference happens in the $300-$600 range. Take the time to calibrate properly, manage cables cleanly, and adjust placement based on the room’s acoustics. The result? Cinematic sound that didn’t require a second mortgage.